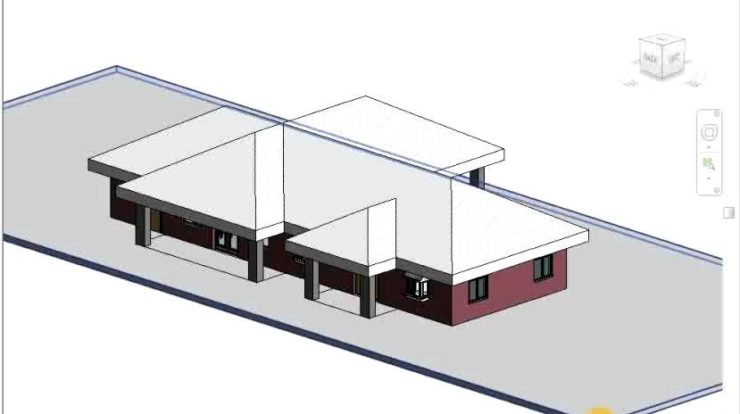
Revit has fast become the most efficient 3D design software for planning and managing construction processes across dozens of industries. But one of the most amazing applications of Revit design today is their plumbing systems.
The software allows for construction designers of any level of proficiency to create good plumbing templates, yet it is only a few that go above and beyond to create great plumbing templates. We hope by the end of this article, you too can utilize some of the tricks mentioned to create beautiful and effective plumbing templates.
Tip #1 Use Setup Templates
Chances are your Revit design will involve many sheets and views. Most of these sheets will have some menial steps or calculations, which have to be repeated over and over again for different sheets. By creating a setup template fully loaded with these initial steps, you can greatly save on time spent re-entering figures as well as keep track of crucial calculations.
Tip #2 Tag Your Diagrams
While it is not necessary for smooth functioning of your 3D plumbing design, tagging devices with individual unique identifiers can make your design infinitely more readable. Furthermore, can also help you quickly make re-adjustments to schematics.
Tip #3 Filtering
Fixtures are an integral part of any plumbing Revit Design, but they aren’t integral to every sheet! Revit allows designers to create filters that can hide these unwanted fixtures, to prevent crowding of your design space. These filters can be applied per layer and per sheet, just make sure you remember to turn them off when you’re done!
Tip #4 Construction Lines
Create truly beautiful to look at, and easy to follow virtual design and construction schematics by using construction lines on your template. These can be used to position fixtures and elements in your design on an organized grid-based system. Mark them in bold or with vibrant colours to help them stand out from the rest of your design.
Tip #5 View Templates
The Revit 3D design software allows designers to work on different sheets, without being able to visualize the other sheets in place. This too, however, can be handled by creating a ‘view template’, which give you the ability to work on your active wireframe while linking other models such as electrical, mechanical, etc.
Tip #6 Shared Parametric Relationships
Parameters represent the characteristic of a relationship between two elements. By creating shared parameters between elements such as drainage fixture units and water supply fixture units, Revit can automatically update fixture counts and calculate total sewer, cold water and hot water demands in your project.
Tip #7 Master Keynote
Keynotes present a helpful way to incorporate comments into your Revit design. But once these keynotes pass a certain quantity, they become nearly impossible to manage or even relocate. By creating a master keynote template, you can accurately and easily keep track of all such comments across your project.

3D modelling software is one of the Read more


A construction designer is a hired professional Read more